DataViz WebApp extension example |
The previous section introduces the DataViz WebApp extension process. This section will take the extension of a Tab page and implementation of adding a tiled layer in the extended Tab page as an example to introduce the extension development in detail.
Step 1: Create the js, css files for the Tab extension function and implement the function of adding tiled layers.
!function() {
}()
!function() {
let plugins = new DataViz.Plugins.DatavizPlugins({
changeTabCallback: changeMenuTab
});
}()
changeMenuTab is the callback function for switching to the extended Tab action.
Code:
function changeMenuTab(id) {
if(id !== 'dv-extension') return;
let parent = document.getElementById(id);
if(!parent) return;
let addTileBtn = createButton('Add TiledLayer');
parent.append(addTileBtn);
addTileBtn.onclick = function() {
let url = "http://192.168.112.201:8090/iserver/services/map-china400/rest/maps/ChinaDark",
layerInfo = {
id: 11,
name: 'ChinaDark'
}
//The add tiledlayer interface
plugins.addTileLayer(layerInfo, url, null,
addLayerCallback);
}
let deleteBtn = createButton('Delete Layer');
parent.append(deleteBtn);
deleteBtn.onclick = () => {
//The delete layer interface
plugins.removeLayerById(11);
}
}
For the usage of the addTileLayer interface in the above code, see: addTileLayer for details.
The addLayerCallback function is implemented as follows:
function addLayerCallback(result) {
//Callback function, if successful, no value will be returned; if an error occurs, it will return {error: errorMsg}
if(result) {
alert("Add failed")
} else {
alert("Added successfully");
}
}
The createButton function is implemented as follows:
function createButton(value) {
let button = document.createElement('div');
button.innerHTML = value;
button.setAttribute('class', 'testButton');
return button;
}
#dv-extension div {
margin-left: 0px;
}
.testButton {
width: 150px;
height: 30px;
background-color: #0081E2;
color: #fff;
border-radius: 4px;
margin-top: 10px;
line-height: 26px;
text-align: center;
cursor: pointer;
}
At this point, the code for extending the Tab page has been completed.
Step 2: Configure the Tab-related js and css files implemented in Step 1. For specific configuration, see: Extension process - step 3
Step 3: Copy the Tab-related resource files to the specific location.
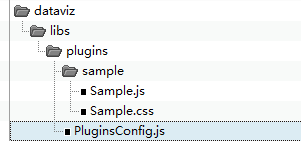
Refer to the Extension process - step 4, copy the Sample.js, Sample.css, and PluginsConfig.js to the path: [iPortal product package]/webapps/iportal/apps/dataviz/libs/plugins/ (If the path doesn't exist, create it). The structure is as follows:
Step 4: Open the DataViz WebApp in the browser to view the development effect.
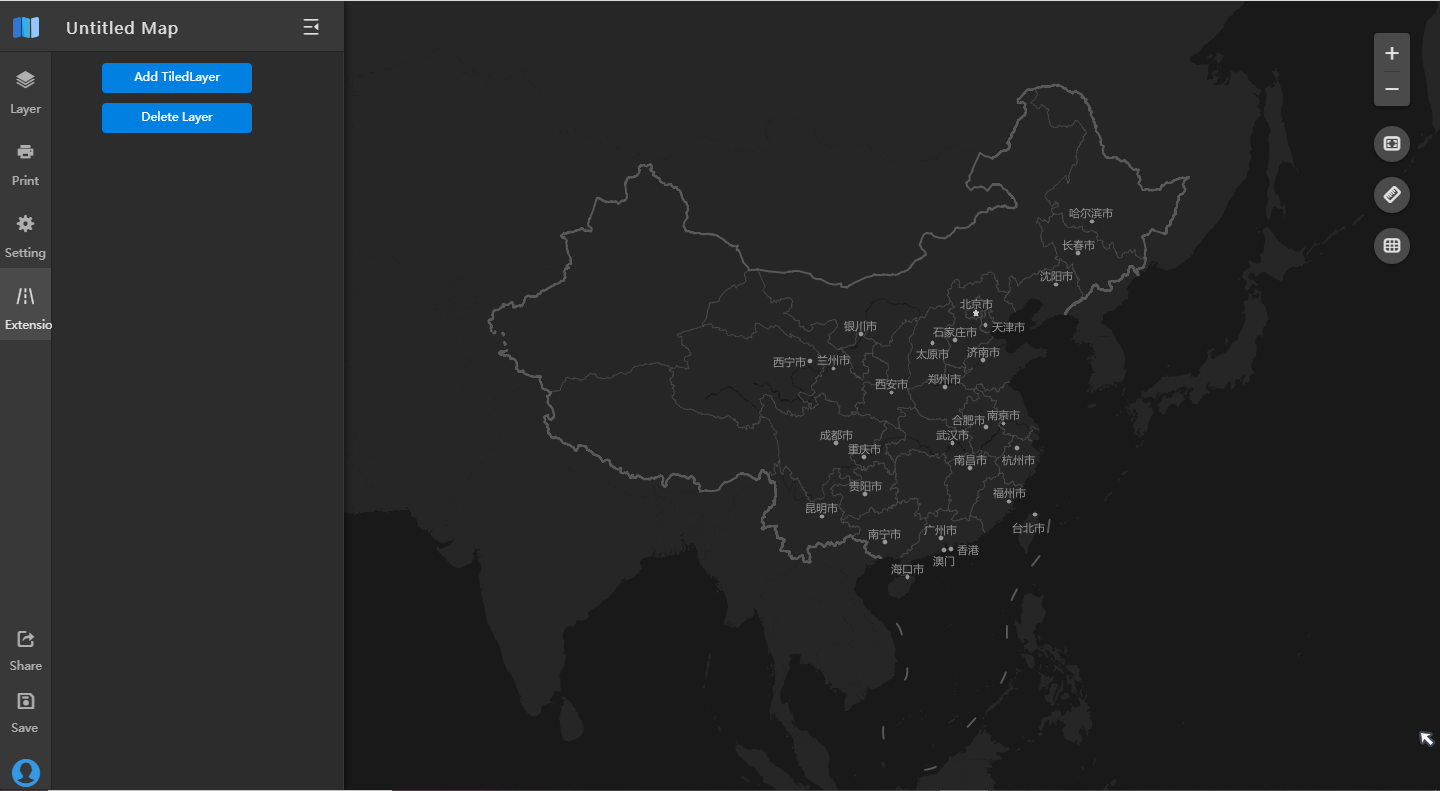
Visit iPortal in the browser, after logging in, click "DataViz" in the drop-down menu of "App Center"in the navigation bar, in the opened page click the "Extension" tab to view the extension interface effect. Click the "Add TiledLayer", the ChinaDark will be displayed on the map.
Note: For more interface usage examples, please find and decompress the webjar-dataviz-*.jar in the [iPortal product package]/webapps/iportal/WEB-INF/lib/ directory and refer to the Sample.js file in the decompressed directory: /META-INF/resources/apps/dataviz/libs/plugins/sample/.