Use iClient Vue MapboxGL to browse maps in iPortal |
iClient Vue-MapboxGL is a Vue component library based on MapboxGL, which supports the following three installation methods:
This example will use the npm installation method to introduce how to access the maps in iPortal using iClient Vue MapboxGL. Before starting to develop, we assume you've known the Vue and Node.js related basic knowledge.
The basic flow of browsing iPortal maps using iClient Vue-MapboxGL components is:
1. Build the development environment;
2. Install the iClient Vue-MapboxGL library;
3. Write the function codes;
4. At last, check the running effect in a browser.
Step 1: Build development environment
Before development, please install the Node.js. Recommended version: v10 and later.
After installing Node.js, run the following command to install Vue CLI, which is a scaffold for quickly creating a Vue project:
npm install -g @vue/cli
Run the following command to create a Vue project "components_webmap_vue", you can change the project name:
vue create components_webmap_vue
Here is an introduction of the key files and directory structure of the created Vue project:
Step 2: Install Client Vue-MapboxGL library
Enter the created Vue project, install the Vue-iClient-MapboxGL, the command is as follows:
cd components_webmap_vue
npm install @supermap/vue-iclient-mapboxgl
Step 3: Write function codes
Open the src/main.js file, insert the following content to import the Vue-iClient-MapboxGL:
import VueiClient from '@supermap/vue-iclient-mapboxgl';
Vue.use(VueiClient);
Open the src/App.vue file, write the following content:
<template>
<div id="app">
<sm-web-map
server-url="https://iportal.supermap.io/iportal"
map-id="801571284"
@load="mapLoaded"
></sm-web-map>
</div>
</template>
<script>
export default {
methods: {
mapLoaded(e) {
this.map = e.map;
console.log(this.map);
}
}
};
</script>
<style>
#app {
height: 100%;
}
</style>
The above code implements accessing the online map (id = 801571284,) from the website: https://iportal.supermap.io/iportal.
Step 4: Run and view the map in a browser
In the project root directory, run the command to start the project:
npm run serve
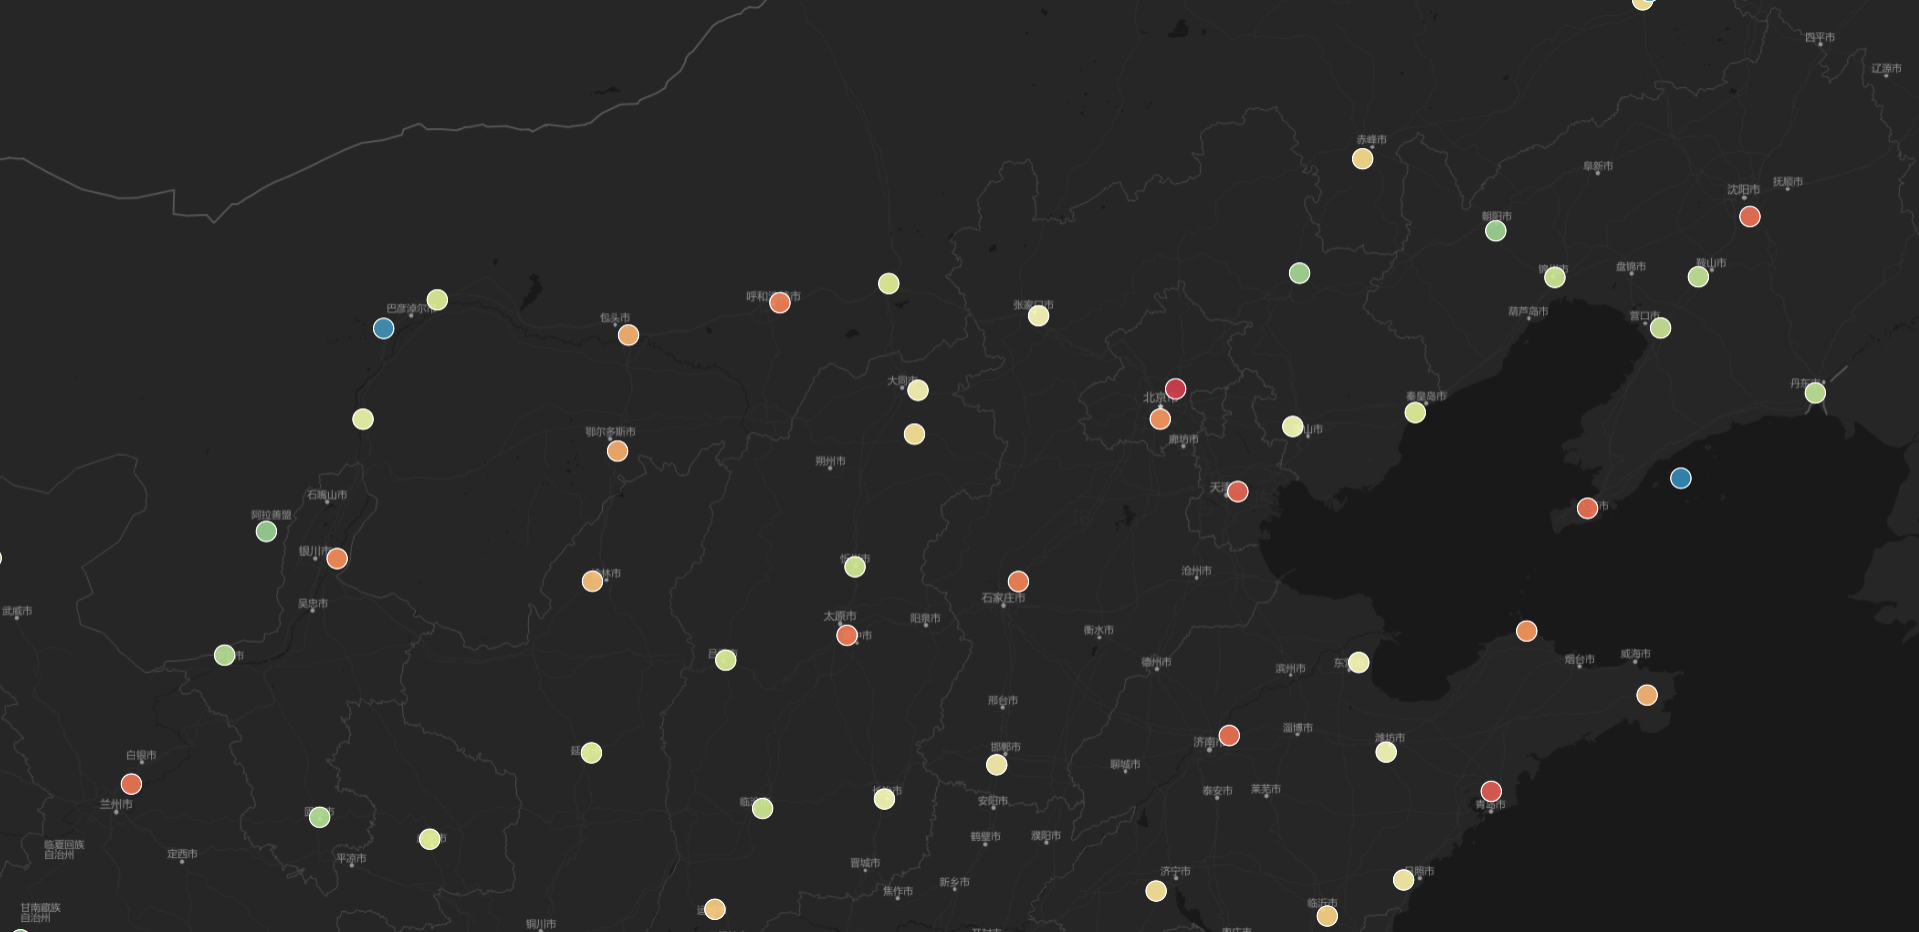
Open the browser, access http://localhost:8080, you can see the following running effect:
Step 5: Publish the Web GIS project. After finishing all the development tasks, you can run the build command to package the Vue project:
npm run build
after that, you can publish your packaged project to middleware such as Tomcat, to access using the HTTP protocol. While the specific process is not the focus of this demonstration, please check the relevant material by yourself.